Hello and welcome to my stop on the wonderful year round blog hop Ho Ho Ho and on We Sew, which is the creation of Fiona and Paula, to help and encourage us to get ahead on our crafting and present making for Christmas. Each month you have the chance to link up your makes and be in with a chance of winning a prize and as a bonus, each of us along the way might have a tutorial for you. Last year I shared my Wrapping Sack and this year I decided to play around with the traditional Christmas Socking.


I love seeing all of the handmade socking hanging on mantlepieces, but in the UK the lovely socking hooks and holders are not that easily available, but after using gripper fabric for a thread catcher I wondered what else I could use it for and an idea was born.

I'm not going to do a full stocking tutorial as there are LOADS on the internet, but I'm going to show you haw to add on a grippy pad to your handmade stocking.

You will need:
Your stocking pieces ready to assemble 2 outer panels 2 lining panels
1 - matching fabric for pad outer 2.5"x6.5"
1 - Grippy Fabric for pad base 2.5"x6.5" I got mine from this UK seller, but I know they have lots on Amazon.com
2 - cotton/muslin for sand sack 2.5"x6.5"
1 - matching fabric for tab 2"x4"
Play sand dried out (I left mine on a baking tray overnight)
First you need to assemble your inner sack to hold the sand, sew them right sides together, leaving an opening to pour the sand in. Trim corners and turn.
Next you need to assemble the outer of the pad, I quilted my top fabric to match the stocking. With the tab fabric fold in half long ways with right sides together and sew. Press the seam open and then turn the sewn piece to create a tube and then press with the seam central on one side.
Once you have done that you need to sew the back and front pieces together and insert the tab correctly (if you are not using a directional fabric this will be a lot easier).
 First put the tab in the centre the top outer fabric with the seam of the tab facing up and the end of the tab at the bottom with the direction of the fabric (if it has one) the right way up. (Does that make sense? Pic 1)
Then roll the end of the tab thats hanging over up and pin it in place (Pic 2)
Get your rectangle of grippy fabric and put it dots down (right side facing) on the top of the outer fabric. You will NOT be sewing all the way around!!
See Pic 4 with the pins showing for where to stop and start your sewing.
Trim the corners and turn the right way around. you should now have two items that look like this!!!
 Next we need to get the pad into the stocking, take your backing fabric and one lining fabric. Lay the backing fabric right side facing up pin the tab in position (I put it about 1.5" in from the back of the stocking side), place lining fabric on top and pin.
 Sew them together across the top, I double stitched over the tab and then press the seam open.
 With the front of the stocking and the other lining fabric, place them right sides together and sew across the top, press.
We are nearly there, next you need to make it look like a stocking without sewing the pad into the seams, with right sides together put the now two stocking pieces together, lining with lining and outer with outer, sew all the around around leaving a good size opening on the foot of the lining. You need to make sure you pin the pad out of the way of the seam.
 Turn the stocking the right way out and press, sew the turning opening closed.
Lastly get your dried play sand and using a piece of paper rolled up into a funnel put the sand into the cotton inner sack, not too much as you need to close it and get it into the outer pad. I sewed the opening shut on the machine.

Put the inner sack into the pad and then hand sew it closed.
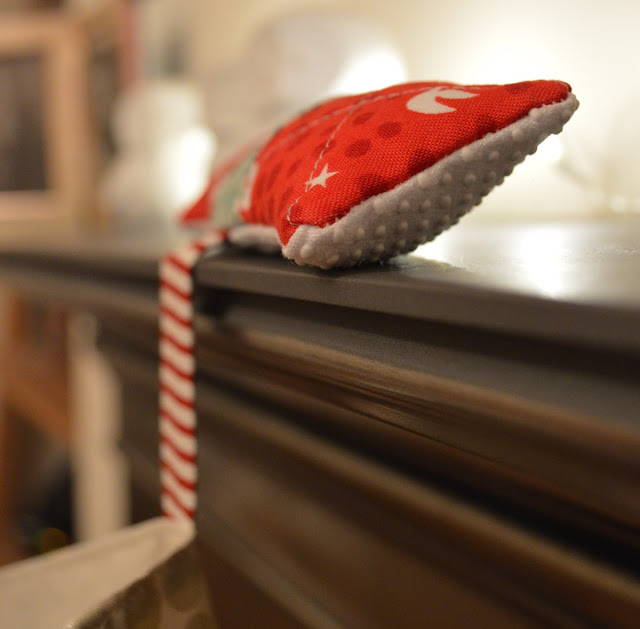
 And you should have a very grippy christmas stocking!
 I hope!
So, time to link your makes up and this month you have the chance to win half a metre of Lost and Found Christmas fabric by Riley Blake, which looks gorgeous.

1 - matching fabric for pad outer 2.5"x6.5"
1 - Grippy Fabric for pad base 2.5"x6.5" I got mine from this UK seller, but I know they have lots on Amazon.com
2 - cotton/muslin for sand sack 2.5"x6.5"
1 - matching fabric for tab 2"x4"
Play sand dried out (I left mine on a baking tray overnight)
First you need to assemble your inner sack to hold the sand, sew them right sides together, leaving an opening to pour the sand in. Trim corners and turn.
Next you need to assemble the outer of the pad, I quilted my top fabric to match the stocking. With the tab fabric fold in half long ways with right sides together and sew. Press the seam open and then turn the sewn piece to create a tube and then press with the seam central on one side.
Once you have done that you need to sew the back and front pieces together and insert the tab correctly (if you are not using a directional fabric this will be a lot easier).

Then roll the end of the tab thats hanging over up and pin it in place (Pic 2)
Get your rectangle of grippy fabric and put it dots down (right side facing) on the top of the outer fabric. You will NOT be sewing all the way around!!
See Pic 4 with the pins showing for where to stop and start your sewing.
Trim the corners and turn the right way around. you should now have two items that look like this!!!


We are nearly there, next you need to make it look like a stocking without sewing the pad into the seams, with right sides together put the now two stocking pieces together, lining with lining and outer with outer, sew all the around around leaving a good size opening on the foot of the lining. You need to make sure you pin the pad out of the way of the seam.

Lastly get your dried play sand and using a piece of paper rolled up into a funnel put the sand into the cotton inner sack, not too much as you need to close it and get it into the outer pad. I sewed the opening shut on the machine.

Put the inner sack into the pad and then hand sew it closed.


So, time to link your makes up and this month you have the chance to win half a metre of Lost and Found Christmas fabric by Riley Blake, which looks gorgeous.

Now these monthly link-up prizes would not be possible without the amazing generosity of the sponsors, a lot of them that I have had the pleasure of ordering from to supply my fabric addiction!!!
  |
http://www.patchworkelephant.com/  |


